FIA EMI App Pakistan: When and How to Upload Travel Documents (2026 Guide)
FIA EMI App Pakistan is becoming an important part of travel preparation for many passengers departing from Pakistan in 2026. If you are traveling for work, study, family visit, tourism, or Umrah, one question matters more than most:
When should you upload your travel documents, and how should you do it correctly?
A lot of travelers do not face problems because they are not eligible to travel. They face problems because they upload the wrong file, submit unclear images, enter details that do not match their passport, or wait until the day of departure. These mistakes are avoidable.
This guide is written to help you avoid that stress.
You will learn:
- what the FIA EMI app is (in simple terms),
- when to upload your documents,
- how to prepare files properly,
- how to complete the upload process step by step,
- what mistakes commonly cause delays,
- and how to do a final check before leaving for the airport.
The goal here is simple: make the process easier, clearer, and safer especially for first time travelers who want a practical guide in plain English.
Why This Guide Matters in 2026
Travel systems are becoming more digital. That means travelers are increasingly expected to submit accurate information before reaching the immigration counter. In practice, this creates two very different experiences:
- Prepared travelers usually move with more confidence.
- Unprepared travelers often get stuck in last minute corrections.
In 2026, relying only on printed papers and hoping everything is fine at the airport is no longer a smart strategy. Digital submission (where applicable) is part of better travel preparation.
This does not mean the app replaces all airport checks. It means you now have a chance to organize your documents in advance, reduce errors, and avoid unnecessary confusion.
That is why timing, document quality, and accurate data entry matter so much.
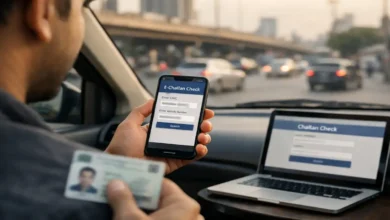
What Is the FIA EMI App Pakistan?
In simple words, the FIA EMI app (or e-immigration style workflow associated with FIA) is a digital process designed to help travelers submit travel related details and documents before airport immigration.
Think of it as a preparation and verification step.
Instead of arriving at the airport with everything happening at once, you may be able to:
- enter your personal details in advance,
- add travel information (like destination and flight details),
- upload supporting documents,
- and complete a pre submission process before departure.
Important point
The exact app interface, wording, and steps can change over time. The name shown on your screen may also differ slightly depending on the rollout or update. That is normal. Digital systems often change labels, buttons, and menus.
What does not change is the core principle:
accurate information + clear documents + early submission = better travel readiness.
Who Should Use This Process Carefully?
If you are traveling internationally from Pakistan, you should take this process seriously. It is especially important for the following groups.
1. First Time International Travelers
First time travelers often make small but costly mistakes:
- wrong passport page uploaded,
- blurred visa screenshot,
- ticket copy with missing flight details,
- name mismatch between documents.
These issues may seem minor at home, but they can create stress at the airport.
2. Work Visa Travelers
Job visa travelers usually carry more paperwork than others. In many cases, they may need to manage:
- passport,
- visa,
- ticket,
- job offer letter or employment contract,
- sponsor/company related documents,
- additional supporting records depending on destination and purpose.
Because there are more documents, there is a higher chance of mismatch if the files are not organized properly.
3. Students
Students often travel with multiple documents, and their cases can be detail heavy. Common files may include:
- passport,
- student visa,
- admission letter,
- fee receipt or enrollment proof,
- accommodation details,
- travel itinerary.
Students also face timing issues because flights, fee confirmations, and accommodation documents may change close to departure.
4. Visit Visa / Family Visit Travelers
Visit visa travelers often assume they only need passport and visa. In reality, they may also need supporting information depending on the situation, such as:
- return/onward ticket,
- host details,
- address/accommodation information,
- travel purpose support.
5. Umrah or Religious Travel Passengers
Religious travel can involve:


- visa,
- passport,
- ticket,
- hotel details,
- group/travel operator documents (if relevant).
When multiple documents are involved, file clarity becomes very important.
6. Travelers Who Previously Faced Delays or Objections
If you have had a travel delay or documentation issue before, pre uploading documents carefully can help you prepare better and catch mistakes early.
The Most Important Question: When Should You Upload Travel Documents?
This is the part many travelers get wrong.
The short answer is:
Do not wait until the day of travel.
The better answer is:
Upload your documents after your key travel details are finalized, and leave enough time to fix mistakes if needed.
Best Practical Timing (Recommended)
A strong and realistic timing strategy looks like this:
- Ideal: 7 to 14 days before departure
- Good: 3 to 5 days before departure
- Risky: Less than 24 hours before departure
- Very risky: Same day / at the airport / on the way to the airport
This timing is not about being extra careful. It is about giving yourself a correction window.
If a file fails to upload, a document is unreadable, or your travel date is entered incorrectly, you need time to fix it calmly.
Why Early Upload Helps
Uploading early gives you time to:
- rescan blurred documents,
- correct spelling mistakes,
- update changed flight details,
- replace an outdated visa file,
- check missing attachments,
- resubmit if needed.
Why Uploading Too Early Can Also Be a Problem
There is another side to this. Uploading too early is not always helpful if your documents are still changing.
For example:
- your visa is not yet issued,
- your flight is not confirmed,
- your passport was renewed,
- your employer sent a corrected contract,
- your travel date changed.
Smart Rule to Follow
Upload only when your major documents are final, but not so late that you lose the chance to correct errors.
That one rule solves most timing confusion.
What Documents Are Usually Needed?
The exact list can vary by travel purpose, destination, and system updates. Always follow the latest fields shown in the app. Still, most travelers can expect a mix of core documents and purpose specific documents.
A. Core Documents (Most Travelers)
These are commonly expected:
- Passport bio data page (clear and readable)
- Valid visa copy (where applicable)
- Flight ticket / itinerary
- CNIC / NICOP (if requested in profile or application)
- Personal details entered exactly as per passport
B. Work Visa / Employment Travel (Common Supporting Documents)
Depending on the case, you may also need:
- employment contract,
- job offer letter,
- sponsor/company details,
- work permit or labor related document (if applicable),
- any destination specific approvals.
C. Student Travel (Common Supporting Documents)
Students may need:
- admission/acceptance letter,
- student visa,
- enrollment proof,
- fee payment proof,
- accommodation details (if requested).
D. Visit Visa / Tourism / Family Visit (Common Supporting Documents)
Travelers in this category may need:
- visit visa,
- return/onward ticket,
- host/sponsor information (if relevant),
- hotel booking or accommodation evidence (if relevant).
E. Religious Travel (Umrah/Hajj Contexts)
This may include:
- passport,
- visa,
- flight details,
- hotel booking,
- group/travel operator documents (if applicable).
Practical Advice
If a document strongly supports your case and the app allows it, uploading a clear and relevant file is usually better than leaving your submission weak or incomplete.
Before Uploading: How to Prepare Documents Properly
Many people blame the app when something goes wrong, but the real problem is often poor document preparation.
This section is where you can save the most time.
1. Scan or Capture Documents Clearly
Your file should be easy to read. Make sure:
- the full page is visible,
- no corners are cut,
- there are no shadows,
- text is not blurred,
- important numbers are readable,
- your fingers are not covering any part of the document.
A bad image creates unnecessary risk, even if the document itself is valid.
2. Use Correct File Format and Manage File Size
The app may accept image files, PDF files, or both. Follow the app instructions on your screen.
General best practice:
- use JPG/JPEG/PNG for single page images,
- use PDF for multi page supporting documents (if supported),
- keep the file size reasonable (very large files may upload slowly or fail on weak internet).
3. Organize Files Before Starting the App
Do not open the app first and then start searching for documents in your phone gallery. That leads to confusion and wrong uploads.
Create one folder before you begin, for example:
- Passport
- Visa
- Ticket
- Job/Study/Visit Support Documents
This makes the process faster and reduces mistakes.
4. Name Files Clearly (If You Are Saving Scans)
Simple file names can prevent accidental mix ups:
- passport biodata.jpg
- visa final.pdf
- flight itinerary.pdf
- employment contract.pdf
- admission letter.pdf
You may not need file names inside the app, but good naming helps you choose the correct file quickly.
5. Check Data Consistency Across All Documents
Before uploading, verify that the following details match:
- full name spelling,
- passport number,
- date of birth,
- nationality,
- visa number (if applicable),
- travel date,
- flight number.
Why this matters
Even one mismatch can create confusion. For example:
- passport says one spelling, ticket shows another,
- visa file is correct but you typed the passport number incorrectly,
- flight date in the app does not match your current itinerary.
Consistency is one of the biggest factors in smooth document review.
Step by Step: How to Upload Travel Documents on FIA EMI App Pakistan (2026 Guide)
The exact screen labels can vary by update, but the practical workflow is usually similar. Follow these steps carefully.
Step 1: Install the Correct App
Before you upload anything:
- verify the correct app name and source,
- use official links/channels where possible,
- avoid unofficial copies or lookalike apps.
This is important because many travelers search quickly, install the wrong app, and then wonder why the process looks different.
Step 2: Register or Log In
You may be asked for some of the following:
- mobile number,
- email address,
- CNIC/NICOP,
- passport number,
- OTP verification,
- password creation.
Best practice
Use a mobile number and email address that you check regularly. If the app sends alerts or status messages, you should be able to receive them immediately.
Step 3: Start a New Application / Travel Submission
Inside the app, look for a section that may be labeled something like:
- New Application,
- Travel Submission,
- Pre Clearance,
- Immigration Declaration,
- e-Immigration / EMI.
The wording may differ, but the purpose is the same: begin your travel document submission.
Step 4: Enter Personal Details Exactly as per Passport
This is one of the most sensitive steps.
Enter:
- full name,
- passport number,
- date of birth,
- nationality,
- contact details,
- CNIC/NICOP (if asked).
Golden Rule
Use your passport as the primary source.
Do not type the name the way you normally write it if it differs from your passport spelling.
For example, if your passport includes a middle name or uses a specific spelling style, follow that exactly.
Step 5: Enter Travel Details Carefully
Typical fields may include:
- destination country,
- travel purpose (work, study, visit, tourism, Umrah, etc.),
- airline name,
- flight number,
- departure date,
- PNR or ticket details (if requested).
Common error to avoid
Do not guess or enter temporary information if your flight is not finalized. Wait until your itinerary is confirmed.
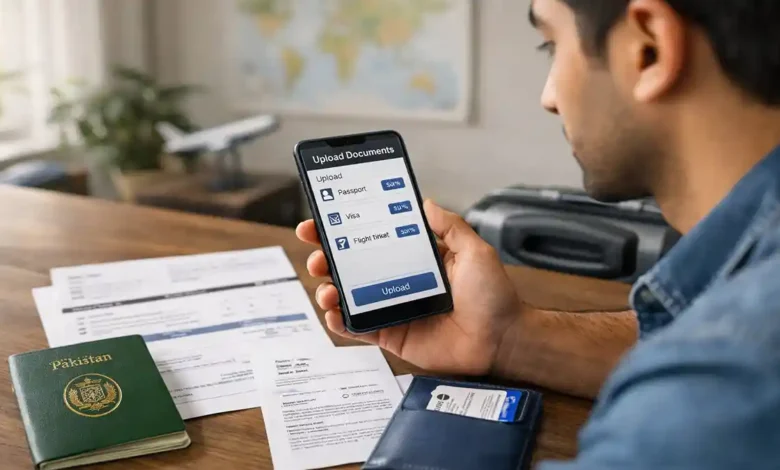
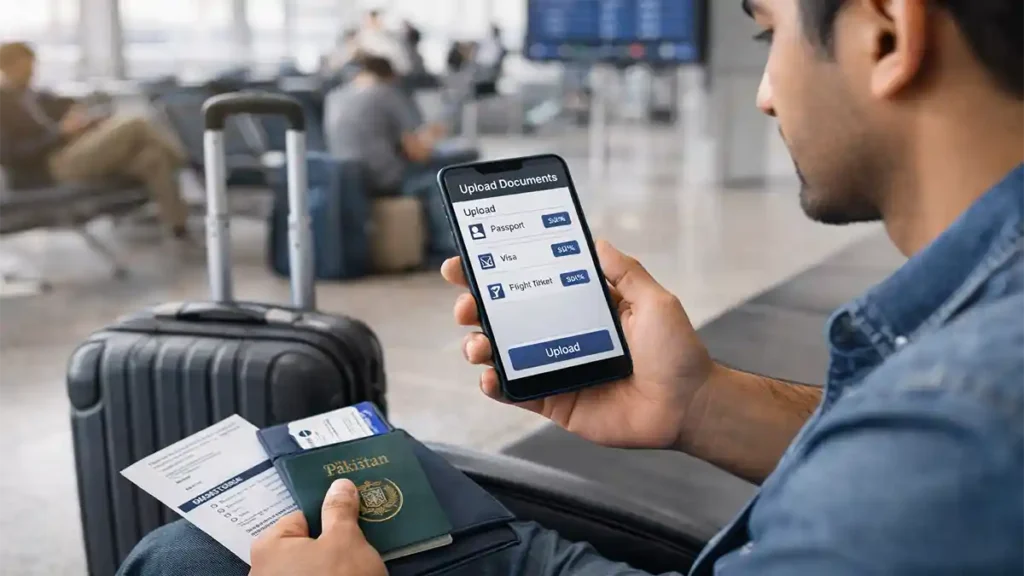
Step 6: Upload Required Documents
Now upload the files into the correct sections.
A clean order usually works well:
- Passport bio data page
- Visa document/page
- Flight ticket/itinerary
- Purpose related support documents
- Additional identity/support files (if requested)
Upload Tips That Help
- Use stable internet (Wi-Fi is usually better than weak mobile data).
- Wait until each file finishes uploading before moving on.
- Reopen previews (if available) to confirm the correct file is attached.
- Do not upload cropped screenshots where important text is missing.
- Do not use edited or filtered images.
Step 7: Review Everything Before Final Submission
This step should never be skipped.
Carefully review:
- name spelling,
- passport number,
- visa details,
- departure date,
- flight number,
- travel purpose,
- attached files.
2 Minute Review Method (Highly Recommended)
Take two minutes and compare:
- app data vs passport,
- app data vs visa,
- app data vs ticket.
This small habit prevents many serious mistakes.
Step 8: Submit and Save Proof
After submission:
- take screenshots of the confirmation/status screen,
- save your application reference number (if shown),
- keep notifications on (if the app supports them).
This helps if you need to track progress or show proof that you submitted on time.

What Happens After You Upload?
Submitting documents does not always mean instant approval. In many digital systems, submission means your information is now available for earlier review, verification, or screening.
Possible Status Types (Wording May Vary)
You may see status labels such as:
- Submitted
- Under Review
- Verified
- Approved
- Incomplete
- Action Required
- Resubmit / Rejected
Different versions of the app may use different terms, but the idea is similar.
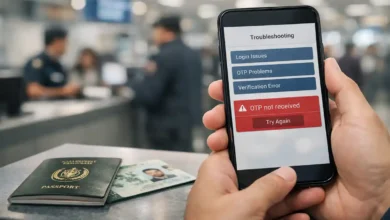
If the Status Takes Time
Do not panic immediately. A delayed status does not automatically mean a problem.
Delays can happen because of:
- high travel volume,
- unclear files,
- incomplete fields,
- system load,
- updates/maintenance,
- manual review requirements.
If You Are Asked to Correct Something
If the app shows action required or a similar message:
- read the issue carefully,
- recheck the document quality,
- verify data entry,
- replace incorrect files,
- resubmit as instructed.
Keep backup files on your phone and email so you can respond quickly.
Most Common Mistakes That Cause Delays (and How to Avoid Them)
This section is based on practical traveler mistakes that happen again and again.
1. Uploading the Wrong Passport Page
A traveler sometimes uploads:
- the last page,
- a visa page instead of the bio data page,
- a blurry photo,
- a partial/cropped image.
Fix
Upload the passport bio data page clearly unless the app specifically asks for another page.
2. Uploading an Old Visa File
This is very common when documents are shared in chat apps.
People sometimes upload:
- an old visa screenshot,
- a draft document,
- a low quality compressed copy.
Fix
Use the final, current visa file with clearly visible details.
3. Flight Ticket Mismatch After a Change
You booked a new flight, but the app still contains the old flight number/date.
Fix
Update the travel details (if editing is allowed) or resubmit with the latest ticket information.
4. Name or Number Mismatch Across Documents
Even small typing errors can cause problems:
- missing letter,
- wrong digit in passport number,
- incorrect date of birth,
- typo in flight number.
Fix
Double check every number and spelling before submitting.
5. Poor Image Quality
Dark, blurry, or heavily compressed screenshots slow things down.
Fix
Use clear scans or high quality photos in good lighting.
6. Waiting Until Departure Day
This is one of the biggest reasons travelers feel panic.
Fix
Upload in advance ideally at least several days before travel once your documents are finalized.
7. Depending Fully on Someone Else
A travel agent or friend may help, but if they upload the wrong file, the traveler still faces the issue at the airport.
Fix
Always review the final submission yourself.
Privacy, Security, and Scam Prevention
Whenever a travel process becomes digital, fake guidance and scams often increase. Travelers should stay careful.
Safety Rules You Should Follow
- Install the app only from trusted/official sources.
- Verify the app before entering passport details.
- Never share OTP codes with anyone.
- Do not send sensitive documents to random people claiming fast clearance.
- Be cautious of unofficial payment requests.
- Avoid uploading documents from shared public devices.
- Log out if you use a borrowed phone.
Protect Your Document Copies
Keep a secure backup of your travel files in at least two places:
- phone folder,
- email,
- private cloud storage,
- printed copies (where practical).
If your phone crashes, the app logs out, or internet is slow at the airport, backups can save your trip from avoidable stress.
Real Life Travel Scenarios (Practical Examples)
Examples make this process easier to understand. Here are realistic situations and better ways to handle them.
Case 1: Work Visa Traveler (Saudi Arabia Example)
Situation: A traveler receives a visa and a ticket only a few days before departure.
Common mistake: Uploading an old contract photo and a blurry visa image from a chat app.
Better approach:
- get the final visa file,
- scan passport bio data page clearly,
- upload the latest ticket,
- attach work related support documents in readable format,
- review all details before submission.
Key lesson: Clear files and matching data reduce unnecessary complications.
Case 2: Student Leaving for First Semester
Situation: A student has admission documents, but the flight changes after initial planning.
Common mistake: Uploading early with a temporary itinerary and forgetting to update it.
Better approach:
- prepare all documents in advance,
- wait for the final flight booking,
- upload within a safe window before departure,
- update the ticket if anything changes.
Key lesson: Early preparation is good, but final submission should reflect final travel details.
Case 3: Family Visit Traveler
Situation: A traveler uploads passport and visa but does not include supporting travel related files where relevant.
Common mistake: Assuming submitted always means strong submission.
Better approach:
- upload all required core documents,
- add relevant supporting documents where requested,
- check that travel purpose is clearly supported.
Key lesson: A complete submission is stronger than a minimal one.
Final 24–48 Hour Checklist Before Going to the Airport
Even after uploading documents in the app, do a final check before departure.
Digital Submission Checklist
- Travel submission completed
- Status checked again
- All uploaded files are saved in backup folder
- App screenshots / confirmation saved
- Reference number noted (if available)
Travel Document Checklist
- Original passport packed
- Valid visa copy available
- Latest ticket/itinerary saved
- Supporting documents organized
- Contact details (sponsor/host/institution/employer) accessible
Phone & Practical Checklist
- Phone fully charged
- Power bank packed
- Mobile data active
- Important files available offline
- Emergency copies in email/cloud
Important Reminder
Digital upload is helpful, but it does not replace carrying your original documents when required. Always travel with the necessary originals and backup copies.
Expert Tips for a Stronger Submission (Small Things That Make a Big Difference)
Here are practical habits that experienced travelers use:
1. Use One Source of Truth
Always use your passport as the main reference for spelling, date of birth, and document number entry.
2. Avoid Chat App Compression
If a document was sent on a messaging app, try to get the original file instead of relying on a compressed screenshot.
3. Keep One Final Folder Only
Do not keep five versions of the same visa in different folders. Create one clearly labeled FINAL TRAVEL DOCS folder to avoid confusion.
4. Do a Second Review With Another Person (Optional)
If you are nervous, ask a trusted family member to check:
- name spelling,
- passport number,
- flight date,
- correct files attached.
Fresh eyes can catch mistakes quickly.
5. Save Proof of Submission
A screenshot of your submission or status page can be very useful later if you need to confirm timing or show that you completed the step.
Quick FAQ
Is the FIA EMI App Pakistan required for every traveler?
Requirements can vary by process, route, and rollout stage. Treat it as an important travel preparation step and always check the latest instructions shown in the app or official guidance before departure.
What is the best time to upload travel documents?
The safest practical window is 7 to 14 days before departure, after your passport, visa, and flight details are finalized. If needed, 3 to 5 days before departure can still work. Same day uploads are risky.
Can I upload documents on the day of travel?
You can try, but it is not recommended. If something is wrong blurred image, wrong file, mismatch, or upload failure you may not have enough time to correct it.
Can I use screenshots instead of scanned documents?
Sometimes screenshots may work, but clear scans or original files are much better. Low quality screenshots often create delays because details may not be readable.
Which document is most important to upload correctly?
The passport bio data page is critical because many other details are matched against it. A mistake here can affect the whole submission.
What if my flight changes after I submit?
Update the application if the app allows edits, or resubmit according to the app workflow. Your ticket details in the app should match your actual departure plans.
My status is still pending. Should I worry?
Not always. Pending or under review status can happen for many reasons, including volume and review time. Recheck the app for messages, keep documents ready, and monitor updates calmly.
Can a travel agent submit documents for me?
Yes, someone may help you, but you should personally review every entry and uploaded file before final submission. You are the one who will face the consequences of errors at the airport.
Conclusion
The biggest problem travelers face with the FIA EMI app process is usually not the app itself. It is poor timing, unclear files, and mismatched details.
If you want a smoother experience, focus on three things:
- Upload at the right time (after your documents are final, but before the last minute)
- Upload clear files (readable, complete, and well organized)
- Upload accurate information (matching your passport, visa, and ticket exactly)
That is the real strategy.
In 2026, travel preparation is no longer just about packing your bags. It is also about preparing your digital documents properly. If you do that well, you reduce stress, save time, and travel with much more confidence.