How to Register on the EMI App Step by Step

Register on the EMI app before your trip and you’ll feel the difference at the airport less last-minute stress, fewer missing document surprises, and a smoother path through immigration checks. If you’re the kind of traveler who prefers to arrive prepared (instead of fixing things at the counter), this is the guide you want.
Pakistan’s airports are steadily moving toward more digital, pre-filled, and automated passenger processing. The EMI App is part of that direction: a practical way to enter your key details ahead of time, verify identity information, attach relevant travel documents, and create a cleaner, faster experience for both passengers and immigration staff.
This article explains the process in plain English, with expert-level detail where it matters. You’ll learn what to prepare, how to sign up correctly, what to upload (and how to upload it so it doesn’t get rejected), how to check your status, and how to avoid the most common mistakes that cause delays.
Note: App screens and labels may vary slightly by version (Android/iOS) and by rollout stage. The steps below follow the standard registration flow used in official travel verification apps: account creation → OTP verification → identity entry → trip creation → document upload → submission/status.
What the EMI App Does (In Simple Terms)
At airports, immigration officers typically confirm four big things:
- Who you are (identity match)
- Where you’re going (flight and destination)
- Why you’re traveling (purpose and supporting proof)
- Whether your documents are valid (passport/visa/residence status)
When travelers provide incomplete or mismatched information, it slows everything down sometimes dramatically. The EMI App is designed to reduce that friction by helping you submit consistent information earlier.
Why travelers use it
- To complete key steps before reaching the airport
- To reduce errors that lead to repeated questioning
- To keep documents organized digitally
- To support faster lanes or digital processing where available
Who Should Register Early (Best Candidates)
While many passengers can complete airport formalities the traditional way, early registration is especially helpful if you are:
- A first-time international traveler
- A student traveling on an education visa
- A worker traveling on an employment visa
- A family group (multiple passengers = more chances of mistakes)
- Traveling during peak seasons (holidays, summer, Eid)
- Someone who has faced offloading concerns, documentation confusion, or name mismatches before
Before You Start: Get These Things Ready (This Saves Time)
Registration is easy when you have your details in front of you. It becomes frustrating when you keep switching between apps, emails, and camera scans.
Must-have items
- Passport (bio-data page details should be readable)
- CNIC (for Pakistani nationals, if required by the app)
- Active mobile number (OTP verification)
- Email address (recommended for recovery and important updates)
- Stable internet (Wi-Fi helps for document uploads)
Strongly recommended travel details
- Airline name
- Flight number
- Departure date
- Departure airport
- Destination city/country
- Booking reference / ticket number (if available)
Documents you may need to upload (depends on travel type)
- Visa or e-visa document (if applicable)
- Residence permit (such as an iqama, if relevant)
- Admission letter (students)
- Employment proof (workers)
- Hotel booking or invitation letter (visitors)
- Return ticket (if applicable)
Step 1: Download the Official EMI App (Do This Safely)
Because “EMI App” becomes a popular search term, you should be careful with look-alike apps.
How to identify the correct app listing
- Check the developer name carefully (official listings usually show an authority-level developer identity)
- Read the app description for official purpose and scope
- Look at recent reviews for real user experiences
- Avoid any listing that has strange symbols, spelling variations, or suspicious claims
Safety tip
If you found a download link through social media, double-check before installing. Official apps do not require you to “pay to activate,” and they don’t ask for sensitive information through random chat links.
Step 2: Open the App and Tap “Create Account”
On first launch, you’ll typically see:
- Log in
- Create account / Sign up
Tap Create account.
You’ll usually enter:
- Full name (exactly as on passport)
- Mobile number
- Email (recommended)
- Password (create a strong one)
Password rules that prevent account issues
- Use at least 10–12 characters
- Mix letters and numbers
- Avoid your CNIC digits, passport number, or birth year
- Don’t reuse the same password you use for social media
Step 3: Complete EMI App OTP Verification (Mobile Number Check)
OTP is a one-time code sent to your phone to confirm the number belongs to you.
What to do
- Enter your mobile number
- Tap Send OTP
- Check your SMS inbox
- Enter the code within the time limit
- Tap Verify
If the OTP doesn’t arrive
Try these fixes (in order):
- Wait 60–90 seconds (network delay happens)
- Tap Resend OTP
- Turn airplane mode ON, then OFF
- Check if your SMS inbox is full
- Restart your phone if needed
- If abroad, confirm roaming is enabled (if required)
Avoid repeated guessing. Multiple wrong entries can temporarily lock verification for security reasons.
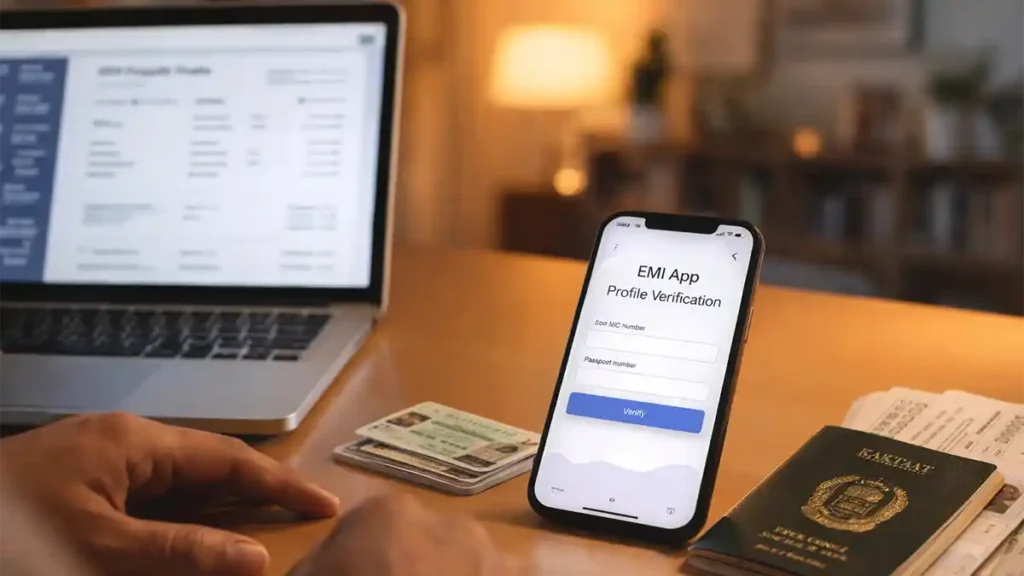
Step 4: Add Your Identity Details (CNIC + Passport)
This is where accuracy matters most. A small typo can trigger verification failure or manual checks later.
Typical fields (may vary)
- Nationality
- CNIC (for Pakistani nationals, where required)
- Passport number
- Date of birth
- Passport issue date
- Passport expiry date
Expert tip: match your passport formatting
Many passports include a machine-readable zone (MRZ) that uses strict formatting. If your passport spells your name a certain way, use the same structure in the app.
For example:
- If your passport shows MUHAMMAD first and you often write MOHAMMAD, choose the passport spelling for registration.
- If your surname is combined in your passport, keep it combined.
This reduces mismatch flags between your profile, ticket, and travel documents.
Step 5: Build a Complete Profile (This Helps Your Trip Get Processed Smoothly)
A strong profile reduces confusion. A weak profile creates delays.
Profile details you should fill carefully
- Full legal name (passport)
- Gender (as per passport)
- Date of birth
- Address (city + country)
- Occupation (student/employee/business)
- Destination country
- Travel purpose (tourism, study, work, family visit, transit)
- Emergency contact (recommended)
Why travel purpose matters
Travel purpose affects what documents are expected. If you select tourism but upload an employment contract, your submission may be questioned. If you select study but do not upload any educational proof, your file may be incomplete.
Choose the category that matches your visa and your documentation.
Step 6: Start a New Trip and Add Flight Details
Now you’ll create your travel entry. Most systems call this:
- Trip
- Journey
- Travel plan
- Flight details
Enter these details carefully
- Flight number (example: PK###, EK###, QR###)
- Airline name
- Departure airport
- Arrival airport
- Departure date (and time if requested)
- Destination city/country
- Ticket reference (if requested)
Quick way to find your flight number
- Check your e-ticket email or PDF
- Look at your airline app booking screen
- Ask your travel agent for the exact flight code
Important: Flight number must match the correct date. Airlines sometimes use the same flight number daily, so confirm you’re selecting the correct day.
Step 7: EMI App Document Upload (Make It Clear, Clean, and Accepted)
This is the most common failure point not because it’s hard, but because people upload unclear images.
What you might be asked to upload
- Passport bio-data page
- Visa page or e-visa document (if applicable)
- Residence permit (if applicable)
- Ticket screenshot or booking confirmation
- Supporting documents based on travel purpose
How to take upload-friendly photos (simple method)
- Place the document on a flat surface
- Use bright, even lighting (avoid shadows)
- Hold your phone steady
- Keep all edges visible
- Avoid glare from glossy pages
File upload best practices
- If the app supports PDF, use PDF for visas and letters (often clearer than photos)
- Don’t compress so much that text becomes unreadable
- Use readable file names when possible (Passport_BioPage, Visa_Copy, Ticket)
Recommended supporting documents by travel type
- Visa (if required)
- Hotel booking or invitation
- Return ticket (recommended)
Student
- Student visa/e-visa
- University admission letter
- Fee receipt or scholarship letter (optional but helpful)
Work
- Work visa/e-visa
- Offer letter or contract
- Employer address/contact info (helpful if asked)
Residents traveling (where applicable)
- Residence permit copy
- Return ticket
- Employer letter (optional)
Step 8: Review Everything Before You Submit (Two Minutes That Prevent Hours of Stress)
Before tapping submit, open your trip entry and check:
- Name spelling matches passport
- Passport number is correct
- DOB is correct
- Visa validity dates are correct (if applicable)
- Flight number and travel date match your ticket
- Uploaded images are sharp and readable
A quick match test
Compare these three items:
- Passport name
- Ticket name
- App profile name
If these don’t align, fix them now. This single check prevents a huge percentage of airport delays.
Step 9: Submit for Verification (What It Means and What It Does Not Mean)
After review, tap:
- Submit
- Send for verification
- Apply
- Proceed
What submission usually means
Your data is now recorded in the system for pre-processing or pre-checking.
What it does NOT mean
- It does not “approve your visa”
- It does not replace immigration officers
- It does not guarantee clearance without questions
Think of it like this: it organizes your information and reduces avoidable issues. Immigration decisions still depend on your documents and travel legitimacy.
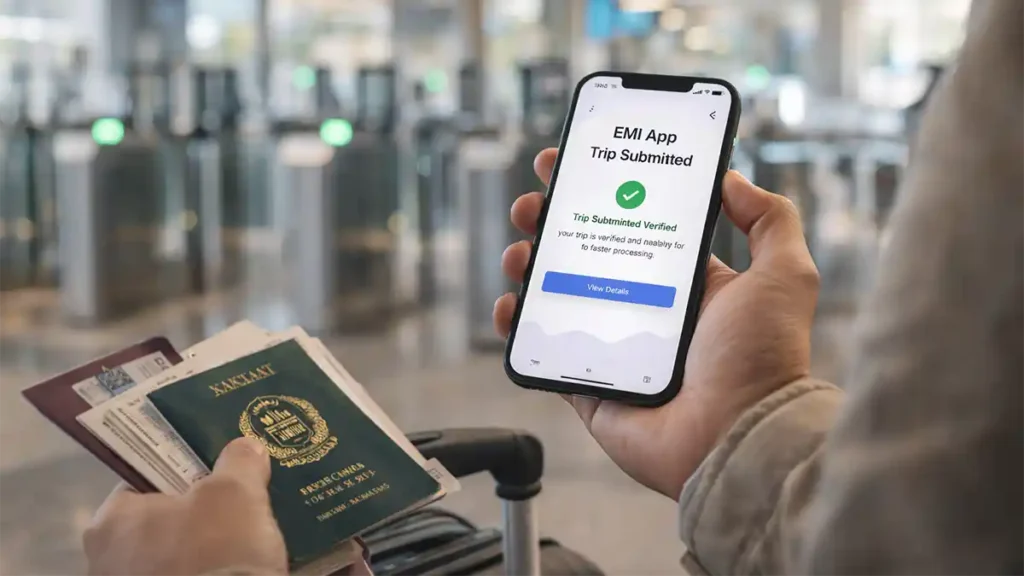
Step 10: Check Your Status (And Know What to Do Next)
Most apps show a status label. Common meanings:
- Submitted / In Review: Your info is pending review or processing
- Verified / Cleared: Your entry looks consistent and ready
- Needs Update: Something is missing or unclear
- Rejected (Upload Issue): A document is unreadable or incorrect
If it says “Needs Update”
Open the trip and look for a highlighted section. The most common reasons:
- Blurry passport photo
- Visa missing or unreadable
- Wrong flight date
- Name mismatch between profile and ticket
Fix the issue and re-submit.
What to Expect on Travel Day (Practical Reality)
Even with a digital system, airports still have real-world variables: queues, airline timing, network availability, and eligibility rules.
Best-case flow
- Your details are already in the system
- You proceed through a faster processing lane where available
- Verification is quicker because key documents were submitted earlier
Typical backup plan
Traditional counters remain the standard option for most passengers, especially if:
- you need assistance
- you have complex travel history
- you have multiple documents to explain
- the airport is still expanding digital lanes
Common Mistakes That Slow People Down (Avoid These)
(1) Using nicknames or short forms
If your passport says “MUHAMMAD,” don’t register as “MOHD” or “M.” unless your passport shows that.
(2) Uploading cropped documents
Cropping off the passport corners or cutting out visa validity dates creates doubt.
(3) Mixing travel purpose and documents
Choose the purpose that matches your visa and supporting proof.
(4) Waiting until the last minute
If you submit hours before departure, you may not have enough time to fix issues.
(5) Using multiple phone numbers
If you register with one number and switch SIMs, OTP and account recovery can become difficult.
Troubleshooting: Fast Fixes for Real Problems
Problem: The app crashes during upload
- Switch to Wi-Fi
- Close other apps to free memory
- Upload fewer documents first, then add more
- Update the app to the latest version
- Restart your phone
Problem: Verification keeps failing
- Double-check CNIC/passport digits
- Confirm passport expiry date
- Re-enter details slowly (typos are common)
- Try again later if the system is under load
Problem: OTP not received
- Resend OTP after waiting
- Toggle airplane mode
- Ensure SMS reception is working
- If abroad, verify your number can receive SMS internationally
Problem: “Server error” or “Try again”
- Wait and retry (peak hours can slow systems)
- Use stable internet
- Avoid repeated rapid clicks (can trigger security throttling)
Privacy and Security (Treat It Like a Banking App)
You’re submitting identity and travel documents. Protect your account.
Do this
- Use a strong password
- Keep OTP private
- Log out on shared devices
- Store your documents securely
Avoid this
- Don’t share screenshots showing CNIC/passport numbers
- Don’t upload documents using random third-party Wi-Fi if you can avoid it
- Don’t install unofficial “helper” apps that promise fast approval
Smart Tips for a Smooth Airport Experience (Even Beyond the App)
Keep a small “travel proof folder”
Have a folder in your phone with:
- Passport scan
- Visa copy
- Ticket PDF
- Hotel booking / invitation
- Employment or admission proof
This helps even if you’re asked questions at the counter.
Arrive with time
Even if you’re “verified,” don’t cut it too close. Airports can surprise you with long queues, gate changes, or extra checks.
Be consistent in your story
If your documents show work travel, your answers should reflect work travel. Inconsistency raises questions.
Mini Case Examples (What “Right” Looks Like)
Example 1: Student traveling abroad
A student registers, verifies OTP, enters passport details, uploads admission letter + visa, and adds flight details three days early. On travel day, the profile is consistent and documents are ready. Outcome: fewer questions, smoother processing.
Example 2: Tourist with mismatched ticket name
A traveler registers under a shortened name while the passport shows full surname. The ticket also uses a different format. The app status asks for an update. The traveler corrects the name format to match the passport and re-uploads the ticket. Outcome: the mismatch is resolved before reaching the airport.
These examples highlight the key theme: accuracy and consistency reduce friction.
Quick FAQ
1. Is it necessary to register on the EMI app for every traveler?
It depends on airport rollout and travel category. If your airport or airline recommends it, registering early is a smart choice.
2. What do I need to create an account?
Typically a mobile number for OTP, basic identity details, and your passport information. CNIC may be required for Pakistani nationals.
3. How early should I register?
Ideally 48–72 hours before departure so you have time to fix upload or verification issues.
4. What documents should I upload?
At minimum, passport bio page. Add visa and supporting documents based on your travel purpose (study/work/visit).
5. My OTP isn’t arriving what should I do?
Wait a minute, resend OTP, check network signal, toggle airplane mode, and confirm your SIM can receive SMS.
6. Does the EMI app approve visas?
No. Visa approval is handled by relevant authorities. The app supports travel verification and pre-processing steps.
7. Can I change flight details after submitting?
Many apps allow edits before final processing. If edits are locked, create a new trip entry if the app supports it.
8. What if I don’t register can I still travel?
In most cases, yes. Traditional processing usually remains available, but registration can reduce avoidable delays.
Conclusion
To register on the EMI app successfully, you don’t need technical skills you need careful attention to details. Download the official app, create your account, complete OTP verification, enter CNIC/passport information accurately, build a complete profile, add correct flight details, upload clear documents, and submit with enough time to fix issues.
Do it early, do it carefully, and you’ll travel with more confidence. Digital immigration tools are most helpful when you treat them like a checklist: correct data in, smooth experience out.


4 Comments