Stunning Travel Photography: How to Capture Breathtaking Images Anywhere
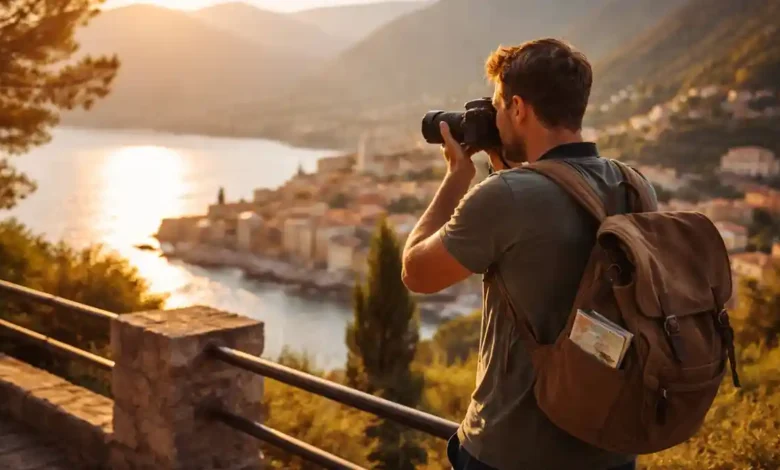
Stunning travel photography isn’t about owning the most expensive camera or visiting only “Instagram-famous” places. It’s about learning to see light, tell a story, and make intentional choices before you even press the shutter. The best part? You can do it whether you’re carrying a full camera kit or using the phone already in your pocket (and that matters, because most photos today are captured on smartphones, according to multiple industry estimates).
Travel photos are powerful because they do two jobs at once: they preserve your memories and they help other people feel what you felt. A great travel image can make viewers smell the street food, hear the ocean, or sense the quiet of a mountain sunrise. This guide will help you capture those kinds of photos consistently with clear steps, simple explanations, and practical examples you can use on your next trip.
Stunning Travel Photography Starts Before You Press the Shutter
If you want your photos to look “effortless,” the truth is: you plan just enough that the moment can happen naturally.
1) Choose a simple story for each day
Instead of trying to photograph everything, pick a theme:
- A place story: “Old Town textures” (doors, signs, stone, alleys)
- A people story: “Morning routines” (bakeries, commuters, tea stalls)
- A nature story: “Light and weather” (clouds, fog, sunbeams, reflections)
This gives your shooting day direction. You’ll stop taking random snapshots and start building a small visual documentary.
2) Research light, not just locations
A location can look ordinary at noon and magical at sunrise. The “golden hour” is famous for a reason: the sun is lower, light is softer, and shadows are longer and more flattering.
Even if you hate waking up early, committing to one sunrise session can transform your entire trip gallery.
3) Make a shot list (but keep it flexible)
Write 8–12 ideas in your notes app:
- One wide establishing shot (where am I?)
- One hero subject (the main moment)
- Three detail shots (hands, textures, food, signage)
- Two portraits or silhouettes
- One night photo
- One unexpected moment (the “wild card”)
This is one of the most useful travel photography tips because it prevents “blank page” confusion when you arrive somewhere exciting.
Gear Choices That Actually Matter (Even If You’re on a Budget)
You can create stunning images with almost any camera. The goal is to choose tools that support your style and travel comfort.
Best minimalist setup
- Smartphone with a clean lens + grid lines enabled
- Small power bank
- Tiny tripod (optional but helpful for night shots)
Best “light but serious” setup
- Mirrorless camera + one zoom lens (like 24–70 equivalent)
- OR one prime lens (like 35mm or 50mm equivalent) for storytelling
- Extra battery + small microfiber cloth
Two accessories that often improve travel photos more than a new camera
- A polarizing filter (CPL) for skies, water, and glare on windows
- A simple strap or wrist strap so you don’t hesitate to shoot
And remember: your camera can’t fix weak light or messy composition. That’s where the real skill lives.
Camera Settings for Travel Made Simple (No Confusing Jargon)
If settings intimidate you, here’s the easiest way to think about it:
The “3 controls” you’re really managing
- Shutter speed controls motion blur (freezing action vs. showing movement)
- Aperture controls depth of field (blurred background vs. sharp scene)
- ISO controls brightness (but high ISO adds noise/grain)
Quick cheat sheet you can memorize
- Street scenes / walking people: 1/250s or faster
- Kids running / action: 1/500s–1/1000s
- Handheld indoor: try 1/125s (stabilization helps)
- Waterfalls silky: 1/4s to several seconds (tripod needed)
- Landscapes: f/8–f/11 (often sharp across the frame)
- Portraits: f/1.8–f/2.8 for soft backgrounds
A simple travel workflow (Beginner → Pro)
- Beginner: Aperture Priority (A/Av) + Auto ISO (with a max limit)
- Intermediate: Manual + Auto ISO (you control motion + depth)
- Advanced: Full manual, plus bracketing for tricky light
A smart exposure habit: protect highlights
Bright skies and white buildings can “blow out” quickly. Many photographers underexpose slightly and lift shadows later, especially in harsh light. If you want to go deeper, “Expose to the Right (ETTR)” is a technique used in digital photography to preserve shadow detail done carefully, without clipping highlights.
Composition for Travel Photos That Looks Professional (Not Staged)
Composition is how you guide the viewer’s eye. It’s the difference between “I was there” and “wow.”
1) Use the Rule of Thirds then break it on purpose
The rule of thirds divides your frame into a 3×3 grid and suggests placing important subjects along lines or intersections. It’s popular because it helps images feel balanced and natural.
Turn on the grid in your camera/phone settings and practice for a week. You’ll improve fast.
2) Look for leading lines
Roads, railings, rivers, shadows, archways lines pull attention toward your subject. In travel photography, leading lines are everywhere:
- Souk alleyways
- Train tracks
- Shorelines
- Mountain ridges
- Rows of street lights at night
3) Frame within a frame
Doorways, windows, palms, hanging fabrics, and arches create natural frames. This instantly adds depth and a “cinematic” travel feel.
4) Use layers for depth (foreground, middle, background)
If your photos feel flat, it’s usually because everything is in one layer. Add foreground:
- A flower, fence, or lantern corner
- A person walking into the scene
- A reflective puddle
Layers are a shortcut to that professional look.
5) Simplify aggressively
Your viewer can’t process everything. Ask:
- What is the main subject?
- What is the distraction?
- Can I move two steps left or right to clean the frame?
This is one of the most underrated travel photography tips moving your feet beats changing your lens.
Golden Hour Photography and Other Light You Should Learn to Love
Golden hour: warm, soft, flattering
Golden hour light is softer because the sun’s rays come in at an angle and diffuse through more atmosphere, which often creates a gentle glow and smoother shadows.
If you want faces to look great, buildings to glow, and landscapes to feel alive shoot golden hour.
Try this golden hour routine:
- Arrive 30–45 minutes early
- Shoot wides first (before crowds arrive)
- Then shoot details + portraits
- Finish with silhouettes as the sun drops
Blue hour: the secret weapon for cities
Blue hour is the period just after sunset or before sunrise when the sky turns deep blue and artificial lights balance beautifully.
This is when you capture:
- Street lights, car trails, skylines
- Mosques, bridges, and monuments with glow
- Reflections in water
A small tripod (even a pocket one) can turn your blue hour shots from “noisy” to “clean and cinematic.”
Overcast light: perfect for people
Cloudy days are not bad days. They’re softbox days.
- Skin looks smoother
- Highlights are controlled
- Colors can feel calm and editorial
On overcast days, focus on street portraits, markets, cafes, and storytelling details.
Harsh midday sun: how to still win
If you must shoot midday:
- Find shade (building edges create dramatic light lines)
- Use backlight (subject between you and sun)
- Shoot tight (details, textures, food, patterns)
- Look for reflections (glass, water, polished stone)
Midday is often when you build the supporting images that make your photo set feel complete.
People Photography While Traveling (Respectful, Natural, Powerful)
Great travel photography includes people not as props, but as real human stories.
The respectful approach (that also gets better photos)
- Smile, make eye contact, and gesture to your camera
- If they say no, thank them and move on
- If yes, take 2–3 frames, then lower the camera and connect
This creates relaxed expressions instead of stiff poses.
Quick portrait recipe that works almost anywhere
- Find open shade (under an awning, near a doorway)
- Place your subject near the edge of shade facing outward
- Background 2–5 meters behind them
- Shoot at f/2–f/2.8 (or phone portrait mode)
- Focus on the eyes
“Candid” without being creepy
Candid doesn’t mean secretive. It means unforced.
- Photograph from a normal distance
- Capture real gestures (pouring tea, fixing fabric, laughing)
- Use a longer focal length if needed (but keep dignity and respect)
If you’re building a brand or publishing photos, learn local norms and be especially careful around sensitive locations.
How to Capture Food, Hotels, and “Travel Lifestyle” Shots That Look Premium
These are the images that often perform best on websites and social media because they feel relatable.
Food photography in 60 seconds
- Sit near a window if possible
- Turn off harsh overhead lights
- Put the plate at a slight angle (not flat top-down unless styled)
- Include one human element (a hand, a drink being poured)
- Don’t over-edit food colors (keep it natural)
Hotel/room photos that look like a magazine
- Shoot corners wide (but keep lines straight)
- Use curtains as diffusers; avoid mixed lighting
- Highlight one hero detail (bed, balcony, bathtub, view)
- Add scale: a suitcase, a robe, a coffee cup
Lifestyle shots aren’t about luxury they’re about story and atmosphere.
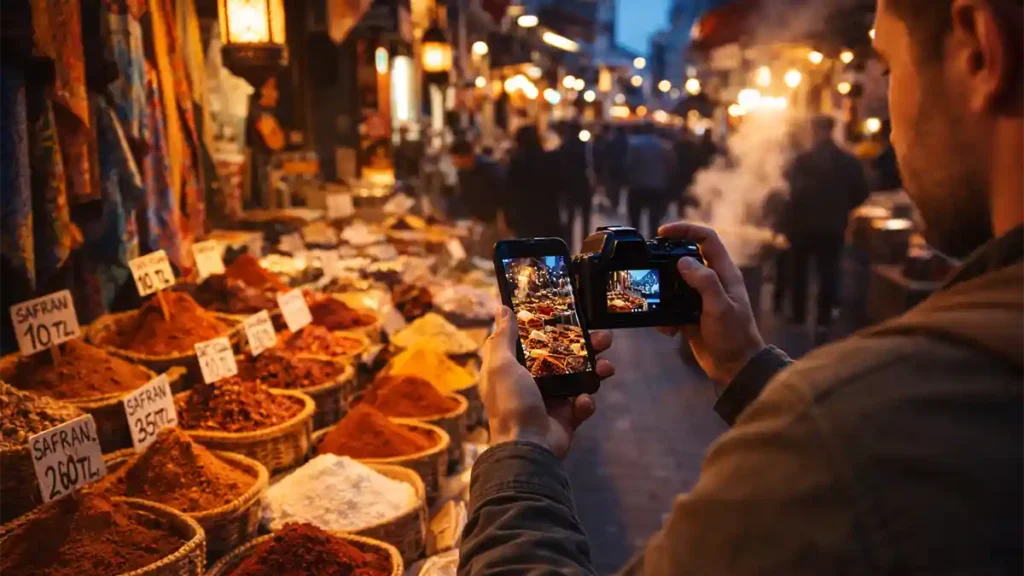
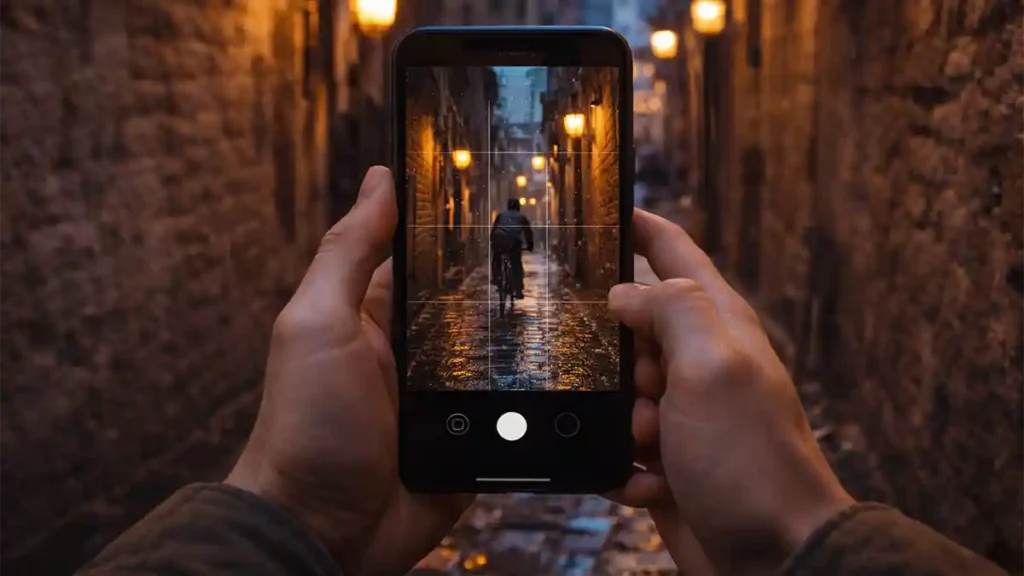
Smartphone Travel Photography: Make Your Phone Shots Look Like a Camera
If your phone photos feel “flat,” it’s usually because of lighting and framing, not the device.
Do these 7 phone upgrades today
- Clean the lens (seriously)
- Turn on grid lines
- Tap to focus; slide exposure slightly down if highlights blow out
- Avoid digital zoom, step closer instead
- Use 2×/3× optical lens if your phone has it
- Use portrait mode for people (watch edge errors)
- Use night mode with support (lean on a wall, or use a mini tripod)
Because smartphone photography dominates modern photo-taking, mastering these basics gives you an advantage instantly.
The “phone pro” trick: shoot for editing
If your phone offers RAW/Pro modes, use them for important scenes (sunrise, landscapes, night city). RAW files hold more detail for editing travel photos later.
Editing Travel Photos Without Making Them Look Fake
Editing should enhance the feeling you experienced, not replace reality with a filter.
A clean, natural editing workflow (works in Lightroom, Snapseed, etc.)
- Straighten + crop (fix the foundation)
- White balance (remove weird color casts)
- Exposure (overall brightness)
- Highlights down, shadows up (recover detail)
- Contrast + clarity (small amounts don’t overdo)
- Vibrance (safer than saturation)
- Selective edits (brighten faces, deepen sky slightly)
Common editing mistakes to avoid
- Orange skin tones (too warm)
- Neon greens and blues (too much saturation)
- Over-sharpening (crispy edges)
- Extreme HDR look (glowing halos)
- Heavy noise reduction (waxy texture)
If you want a modern, premium look: keep blacks slightly rich, protect highlights, and aim for consistent color across your set.
Consistency beats perfection
A travel photo series looks “pro” when it feels unified:
- Similar warmth/coolness
- Similar contrast
- Similar crop style
This is why creators build presets but you can do it manually by editing one “reference photo” first, then matching the rest.
The Travel Photographer’s Shot List: 12 Images That Tell a Full Story
If you only capture postcard landscapes, your gallery can feel empty. Try capturing a complete story set:
- Establishing wide (location)
- Medium scene (activity)
- Tight detail (texture)
- A portrait
- Hands doing something (craft, cooking, work)
- A sign/landmark detail
- Local transport (bus, boat, taxi)
- Food/drink moment
- A “quiet” scene (empty street, calm sea)
- A night shot
- A weather moment (rain, fog, wind)
- Your personal perspective (feet on trail, reflection, shadow)
This approach naturally creates more engaging blog posts and social carousels.
Real-World Scenarios: Exactly What to Do in Common Travel Situations
Scenario 1: Crowded landmark at midday
Goal: Make it feel calm and cinematic.
- Shoot tight details (stone carving, door patterns)
- Use people as scale, not clutter (one subject, not a crowd)
- Find symmetry and shoot straight-on
- Try a silhouette in a shaded arch
Scenario 2: Market or bazaar with fast motion
Goal: Freeze the energy.
- Shutter speed 1/250s or faster
- Look for one “clean background” stall
- Wait for a gesture (handing change, pouring tea)
- Shoot short bursts (3–5 frames)
Scenario 3: Mountains or coastline at sunrise
Goal: Capture mood and depth.
- Arrive early, shoot blue hour first
- Use layers (rocks foreground + sea middle + sky background)
- Try exposure bracketing if dynamic range is extreme
- Keep the horizon perfectly level
Scenario 4: Night city scenes
Goal: Sharp, clean photos.
- Use a stable surface or tripod
- Keep ISO as low as possible
- Focus on bright edges (signs, lit buildings)
- Include reflections (wet streets, glass)
Safety, Ethics, and Pro Habits That Protect Your Work
Back up like a professional (even on vacation)
Use the 3-2-1 rule idea:
- 3 copies of important photos
- 2 different storage types (SD + phone/cloud, or SSD + cloud)
- 1 copy stored separately (cloud is easiest while traveling)
At minimum: copy your photos to your phone or an SSD each night.
Keep yourself safe for the shot
No photo is worth risky cliffs, unstable rooftops, or unsafe neighborhoods at night. If it feels off, leave.
Respect culture and privacy
Ask before photographing people closely. Avoid sensitive places where photography is restricted. Ethical behavior doesn’t limit creativity it builds trust, and trust leads to better photos.
The Most Common Travel Photography Mistakes (And How to Fix Them Fast)
- Shooting everything at eye level → crouch, go higher, change angle
- Cluttered backgrounds → move your feet, simplify
- Harsh light portraits → open shade or backlight
- Over-editing → reduce saturation, protect skin tones
- Too many random shots → follow the 12-image story set
- Not enough people/details → shoot moments, hands, textures
- No “hero” image → plan one sunrise/sunset session
Fixing just two of these will noticeably upgrade your portfolio.
Quick FAQ
What’s the best time for stunning travel photography?
Golden hour and blue hour for soft light, color, and mood.
What camera settings should I use for travel shots?
Start with Aperture Priority + Auto ISO; keep shutter ≥ 1/250 for street scenes.
How do I make travel photos look more “pro”?
Use clean composition: leading lines, simple backgrounds, and strong foreground depth.
Can I take great travel photos with a phone?
Yes, use grid lines, tap-to-focus, avoid digital zoom, and shoot in good light.
How do I photograph people respectfully while traveling?
Ask with a smile, accept “no,” and keep it quick and polite.
What’s the easiest way to improve my editing?
Straighten first, reduce highlights, lift shadows slightly, and keep skin tones natural.
Conclusion: Your Next Trip Can Produce Your Best Photos Yet
Stunning travel photography is not luck. It’s a repeatable process: plan around light, simplify composition, understand a few settings, capture people and details respectfully, and edit with a natural hand. When you approach each location with a story in mind and you learn to see light like a photographer your travel photos stop looking like snapshots and start looking like scenes from a film.
On your next outing, don’t try to do everything. Pick one location, shoot it in two types of light (golden hour and blue hour), capture a wide shot, a portrait, and five details and edit them consistently. Do that for a week, and you’ll feel the difference in your work immediately.
5 Comments